Achieving silky smooth hair can instantly boost your confidence and leave you feeling fabulous. One of the best tools for creating this sleek look is a hair straightener. However, learning how to use a hair straightener properly is crucial for achieving the best results while minimizing damage to your hair. This guide will walk you through the essential steps, from prepping your hair to selecting the right temperature settings, to help you get that coveted straight hair look.
1. Prepping Your Hair
The foundation of a great hair straightening routine begins with proper hair preparation:
- Washing and Conditioning: Start by washing your hair with a shampoo and conditioner suitable for your hair type. This helps to remove any dirt, oil, or product build-up and prepares your hair for heat styling. Use a conditioner that provides moisture and smoothness, which can make the straightening process easier and more effective.
- Drying Your Hair: After washing, gently towel-dry your hair to remove excess water. It’s important not to rub your hair vigorously with the towel, as this can cause frizz and damage. Instead, gently blot your hair. Once towel-dried, it’s essential to dry your hair completely using a blow dryer before using a straightener. Using a straightener on wet or damp hair can lead to significant damage, as the heat can cause water inside the hair shaft to boil, leading to breakage.
- Applying Heat Protectant: Before applying any heat to your hair, generously apply a heat protectant spray or serum. This product forms a protective barrier over your hair, helping to shield it from the damaging effects of high temperatures. Make sure to distribute the product evenly throughout your hair, paying special attention to the ends, which are the most vulnerable to damage.
2. Sectioning Your Hair
Proper sectioning is key to achieving an even, professional-looking finish:
- Detangling: After your hair is dry and heat protected, use a wide-tooth comb or brush to gently detangle your hair. This ensures that your hair is smooth and free of knots before you start straightening.
- Dividing Your Hair into Sections: Divide your hair into manageable sections to make the straightening process easier and more efficient. Typically, separating your hair into four to six sections works well, depending on your hair's thickness. Clip the top sections up and start working with the bottom layers first. Smaller sections (about 1-2 inches wide) ensure that each strand is evenly straightened.
3. Straightening Your Hair
Now that your hair is prepped and sectioned, it’s time to start straightening:
- Selecting the Right Temperature: Set your hair straightener to the appropriate temperature for your hair type. If you have fine or damaged hair, a lower temperature (around 300°F or 150°C) is recommended. For thick, coarse hair, you may need a higher setting (up to 450°F or 230°C). Using the right temperature minimizes the risk of heat damage while effectively straightening your hair.
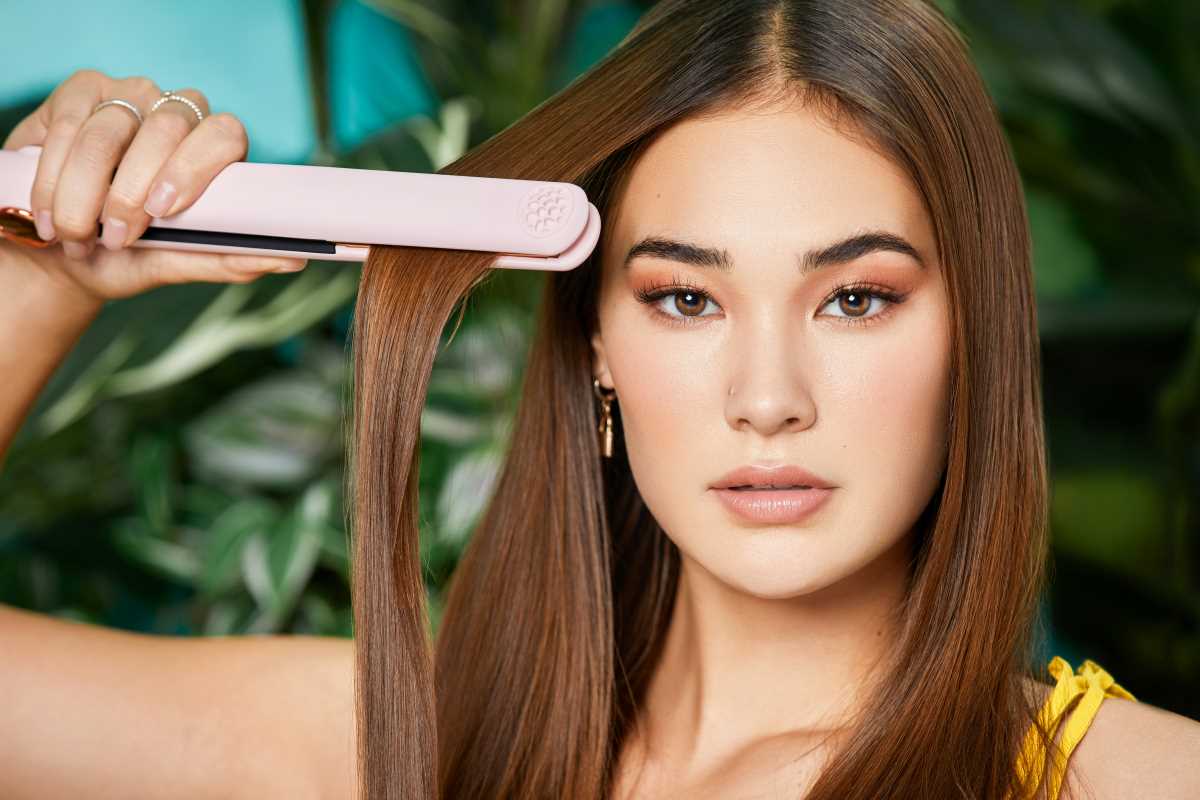
- Straightening Technique: Take a small section of hair and place the straightener close to the roots, but not directly on your scalp to avoid burns. Slowly glide the straightener down the hair shaft towards the ends in one smooth, continuous motion. Avoid going over the same section multiple times to prevent unnecessary heat exposure. If your hair doesn’t straighten in one pass, you can go over it again, but try to limit the number of passes to reduce damage.
- Continue Section by Section: Work methodically through each section of hair, moving from the bottom layers to the top. Take your time to ensure each section is fully straightened, but be careful not to rush or apply too much pressure, as this can lead to creases or uneven texture.
4. Finishing Touches
After you’ve straightened all sections of your hair, it’s time to add the final touches:
- Running Your Fingers or a Brush Through Your Hair: Gently run your fingers or a brush through your straightened hair to blend the sections together and ensure a smooth, cohesive look. This can help eliminate any remaining kinks or creases.
- Applying a Finishing Product: To enhance shine and reduce frizz, apply a small amount of finishing serum or hair oil to the ends of your hair. Be careful not to apply too much product, especially near the roots, as this can make your hair look greasy. A lightweight serum will help maintain the sleekness of your style and add a polished finish.
5. Maintenance and Aftercare
To keep your hair healthy and prolong the results of your straightening:
- Use a Deep Conditioning Treatment: Once a week, treat your hair to a deep conditioning mask or treatment. This helps to replenish moisture and repair any damage caused by heat styling, keeping your hair strong and shiny.
- Limit Heat Exposure: To prevent long-term damage, try to limit the use of your hair straightener to a few times a week. On days when you’re not using heat, consider alternative styles like braids or buns that don’t require heat.
- Always Use Heat Protectant: Make it a habit to never skip the heat protectant step, even if you’re in a hurry. Protecting your hair from heat damage is crucial for maintaining its health and appearance.
Final Thoughts
Using a hair straightener can be a game-changer in your hair styling routine when done correctly. By following this detailed step-by-step guide, you can achieve the silky, smooth hair of your dreams while minimizing damage. Remember to take care of your hair by incorporating protective measures and enjoying the confidence that comes with having perfectly straightened, healthy hair.
(Image via Unsplash)