Every eyeshadow look that stops you in your tracks — the soft gradient, the smoky corner, the color that seems to melt into the skin — comes down to one skill: blending. Not the palette, not the number of shades, not some secret product. Blending is what turns stripes of powder into a seamless wash of dimension, and it is a learnable, mechanical process with a fixed order of operations. Work the steps in sequence, with the right brush doing the right job, and even a three-shade look from the simplest palette will read as polished. Here is the complete method.
Start With a Primed, Even Base
Blending happens on the surface of the lid, so the surface has to cooperate. Bare eyelids are slightly oily and often uneven in tone, which makes powder shadow grab in patches and crease within hours — and patchy shadow cannot be blended smooth, no matter how long you buff. Apply a thin layer of eyeshadow primer or a long-wearing concealer across the lid, up to the brow bone, and blend it with a fingertip until it disappears. Give it a minute to set.
Then lock the base with a light dusting of translucent powder or a matte shadow close to your skin tone. This step is easy to skip and costly to omit: shadows glide and diffuse over a powdered base, while they skid and stick on a tacky one. A smooth, even, slightly powdered lid is half the blend before any color touches it.
The Brushes That Do the Blending
Technique cannot outrun the wrong tools. Fingers are fine for smearing on a single shade, but a gradient needs brushes — and really only three of them:
- A fluffy blending brush with soft, loosely packed bristles, for sweeping transition color through the crease and softening every edge
- A flat shader brush with dense, short bristles, for pressing lid color on rather than sweeping it
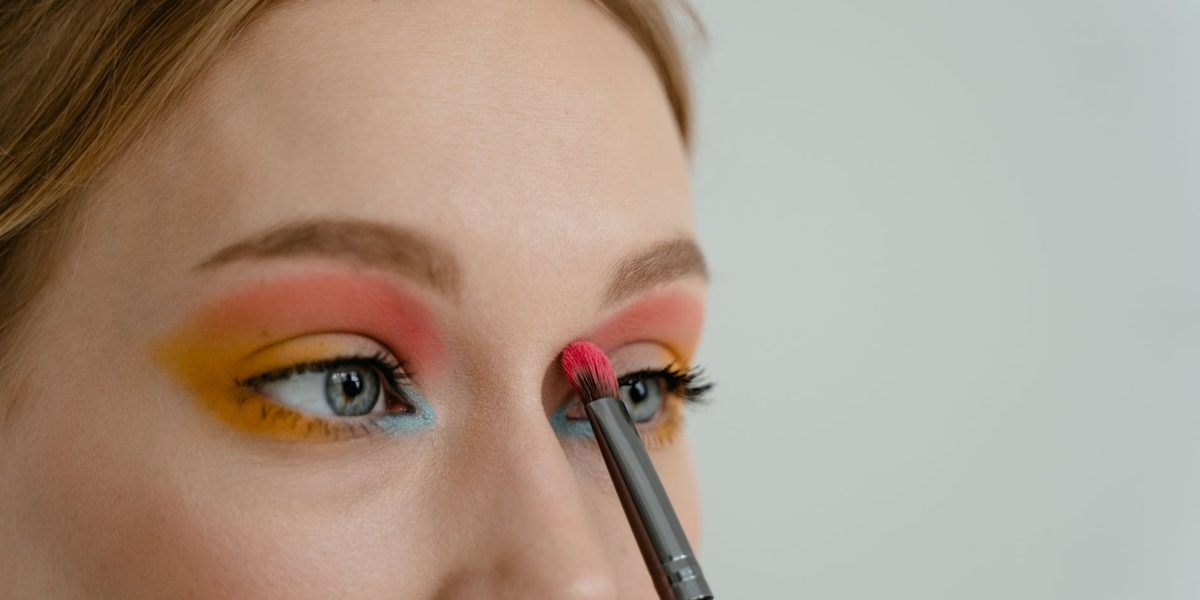
- A small pencil or smudge brush with a tapered tip, for precise depth in the outer corner and along the lash line
If you can add a fourth, make it a second clean fluffy brush kept color-free for final buffing. Whatever you own, start every look with clean, dry brushes; a blending brush still loaded with a previous look muddies each new shade as you apply it.
Step One: Sweep a Transition Shade Through the Crease
The transition shade is the unsung hero of every blended look — a matte color just a touch deeper than your skin tone, whose entire job is to be the soft middle ground between bare skin and darker color. Load a little onto the fluffy brush, tap off the excess, and sweep it through the crease using windshield-wiper motions: back and forth along the socket line, from the outer third toward the middle, with light pressure and the brush barely kissing the skin.
Keep your eye open and relaxed while you look into the mirror so you can see where the crease actually sits; on hooded eyes, work slightly above the fold so the color shows when the eye is open. Build the transition gradually until there is a soft, diffused halo of color with no visible start or stop. This shade sets the stage — every darker color you add will be blended into it, not into bare skin.
Step Two: Deepen the Crease
Now take a medium-depth matte shade — deeper than the transition, lighter than your darkest color — on the same fluffy brush or a slightly smaller one. Place it into the lower part of the crease with the same windshield-wiper motion, but a smaller wiper: concentrate the color in the outer half and keep it beneath the halo of transition shade, so the transition color always peeks out above it.
This is where the gradient is born. The deeper shade should melt upward into the transition with no visible boundary. If you see a line, do not add more product — switch to the clean end of the brush and buff along the seam in small circles until it dissolves. Two thin passes of color, each blended, will always look smoother than one heavy pass buffed frantically.
Step Three: Pack the Lid Shade With a Flat Brush
The lid is where you switch tools and, crucially, switch motions. Take your lid color — this is the place for shimmer or satin if you want it — on the flat shader brush and press it onto the mobile lid, patting and stamping rather than sweeping. Packing deposits dense, vibrant color exactly where you put it; sweeping would drag the crease work around and sheer the color out.
Cover the lid from the lash line up to the lower edge of your crease color, then use short, gentle strokes only along that upper border so the lid shade and crease shade lace into each other. Shimmer shadows apply more intensely if you lightly dampen the flat brush first — an old artist trick that also cuts fallout. If sparkle scatters below the eye, sweep it away with a clean fluffy brush and a light hand.
Step Four: Add Depth to the Outer Corner
Depth is what gives a blended look its shape. Take your darkest shade on the small pencil brush and place it sparingly in the outer corner of the eye, pressing it into the wedge where the outer lash line meets the crease. Then blend it inward and upward, nudging the color into the crease shade with tiny circular motions so it deepens the corner without turning into a hard patch.
The golden rule with dark shadow: build in whispers. Tap the brush on the back of your hand before it touches your eye, apply less than you think you need, and repeat. Dark shadow over-applied is the hardest mistake to walk back — the fix is usually to press a little of the transition shade over the top and blend the edges again.
Step Five: Highlight and Do the Final Buff
Finish the gradient at both ends. Sweep a matte highlight shade just under the brow bone to give the crease color a clean upper boundary, and dab a small amount of a light shimmer shade onto the inner corner of the eye with the pencil brush to open the whole look up.
Then perform the final pass that professionals never skip: take your clean, color-free fluffy brush and lightly buff around all the edges — above the crease, the outer corner, the borders between shades — using feather-light circles. This last buff erases any residual demarcation and pulls the entire eye into one continuous gradient. Wipe away any fallout under the eye and finish with mascara.
Brush Hygiene and Blending Mistakes to Avoid
Blending quality decays quietly as brushes get dirty. Spot-clean your shadow brushes with a quick-dry brush cleanser or by swirling them on a textured cleaning pad between looks, and give them a proper wash with gentle soap and lukewarm water every week or two, reshaping the bristles and drying them flat overnight. Dirty brushes muddy colors, blend poorly, and carry oil and bacteria back to your eyelids.
Beyond hygiene, most blending frustration traces to a few repeat offenders:
- Skipping primer and powder, so shadows grab in patches that no brush can smooth
- Using one brush for every shade, dragging each color into the next
- Pressing hard — blending is done with the tips of the bristles, not the sides
- Skipping the transition shade and blending dark color directly into bare skin
- Over-blending in one spot until the shades turn into a single muddy tone
- Applying dark shades in heavy doses instead of thin, buildable layers
Final Thoughts
Seamless eyeshadow is a sequence, not a talent: prime and powder the lid, sweep a transition shade with windshield-wiper motions, deepen the crease, pack the lid color with a flat brush, whisper the dark shade into the outer corner, highlight, and finish with a clean-brush buff. Keep the pressure light, the layers thin, and the brushes clean, and the soft, airbrushed gradient stops being something you admire on other people and becomes something you do in ten minutes flat.