A foam roller is one of the cheapest pieces of recovery equipment you can own, and also one of the most misused. Most people either roll frantically back and forth for thirty seconds and declare the job done, or grind into a sore spot until their eyes water, convinced that more pain means more benefit. Neither is how the tool is meant to work. Used properly, foam rolling is a slow, methodical self-massage routine — a way to ease the tight, heavy feeling in muscles after exercise or a long day of sitting, and a pleasant ritual that helps you wind down and check in with your body. This guide covers choosing a roller, learning the basic technique, and running a complete head-to-toe routine. It is general wellness guidance: foam rolling is for ordinary muscle tightness, not for injuries, and anyone with a health condition, an injury, or persistent pain should ask a doctor or physical therapist before adding it.
Step 1: Choose the Right Roller
Rollers vary along two dimensions that matter: density and surface. For density, beginners should start soft to medium. A softer foam roller lets you learn technique and tolerate the sensation; the very firm rollers reward experienced users and punish new ones. If the choice is between too soft and too hard, choose too soft — you can always press more of your body weight into a soft roller, but you cannot make a hard one gentler.
For surface, smooth is the sensible default. Textured rollers with ridges and knobs promise a deeper massage and deliver a more intense one, which is exactly what a beginner does not need. Size-wise, a standard long roller is the most versatile because it supports your whole back and stays stable under you; shorter travel-size rollers work fine for legs and are easier to store. One roller is enough. If you later find specific spots that a roller cannot reach well, a firm massage ball is the usual companion purchase — but start with the basics.
Step 2: Learn the Core Technique Before the Routine
Every muscle group uses the same underlying procedure, so learn it once. Position the roller under the target muscle and support your body weight on your hands and feet so you control exactly how much pressure the muscle receives. Roll slowly — a leisurely crawl along the length of the muscle, taking several seconds in each direction, not a rapid scrub. Breathe normally the entire time; holding your breath is a sign you are pressing too hard.
Target a sensation of pleasant discomfort: the feeling of a firm, satisfying massage, around a five or six out of ten at most. Sharp pain, numbness, tingling, or pain that makes you clench are all signals to back off immediately. When you find a tender spot, do not grind on it — pause on it with light, steady pressure for twenty to thirty seconds while breathing slowly, then move on. Two important boundaries: roll muscle, never bone or joints, and never roll your lower back directly — the spine there has no rib cage protecting it, so the lower back gets addressed indirectly through glutes, hips, and upper back instead.
Step 3: Roll the Lower Legs and Thighs
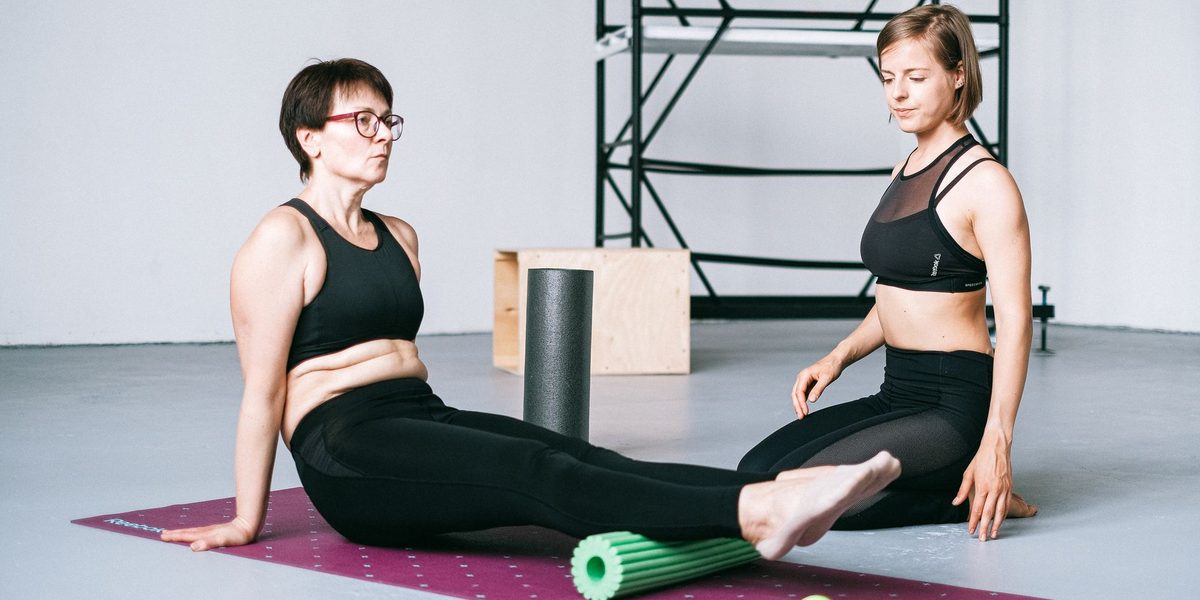
Start the routine from the ground up. Calves: sit on the floor with the roller under one calf, hands behind you for support, and the other leg either resting on the floor or crossed over the working leg for extra pressure. Roll slowly from above the ankle to below the knee, rotating the leg slightly to reach the inner and outer portions. Spend about thirty to sixty seconds per side.
Hamstrings: stay seated, move the roller under the back of one thigh, and roll from above the knee to just below the sit bone, again turning the leg gently to cover the whole muscle group. Quadriceps: flip over into a forearm-plank position with the roller under the front of one thigh. Roll from above the kneecap to below the hip crease, and control pressure by keeping more or less weight on your forearms and the other leg. The quads are commonly tender on desk-bound and active people alike, so this is a spot to practice the pause-and-breathe technique rather than powering through.
Step 4: Roll the Glutes and Outer Hips
Sit on the roller with your hands behind you, then lean toward one side so the roller presses into that buttock rather than your tailbone. Crossing the ankle of that side over the opposite knee opens the area up and deepens the pressure. Roll slowly over the whole muscle, pausing on tender spots, for thirty to sixty seconds per side. For many people who sit most of the day, this is the single most valuable stop in the entire routine.
For the outer hip and thigh, lie on your side with the roller under the outside of the upper thigh, supporting yourself generously on your forearm and the opposite foot. This region is famously sensitive, so use the lightest pressure the position allows and keep sessions here short. If side-lying rolling feels like too much even with support — a common and completely normal experience — skip it and let the glute work cover the area. Nothing in this routine is mandatory.
Step 5: Roll the Upper Back, Lats, and Shoulders
Lie on your back with the roller horizontal beneath your shoulder blades, knees bent, feet flat, and hands supporting your head like a sit-up. Lift your hips slightly and roll slowly between the mid-back and the top of the shoulders — never down onto the lower back. Crossing your arms over your chest spreads the shoulder blades and lets the roller reach the muscles between them, which is bliss for desk workers. This is also the one move where a gentle extension — draping your upper back over the roller for a breath or two — feels wonderful after a long day hunched forward.
For the lats, lie on one side with the arm extended overhead and the roller tucked under the armpit region, rolling a short distance along the outer edge of the upper back. Keep pressure light and movements small. Throughout the upper-body work, remember the rule about rolling muscle, not bone: if you feel the roller on your spine or shoulder blade edges, adjust your angle.
Step 6: Fit Rolling Into Your Week
Foam rolling earns its keep as a routine, not a rescue. The full-body sequence above takes ten to fifteen minutes, and there are three natural slots for it. After workouts, a shortened version focusing on the muscles you trained makes a satisfying end to a cool-down. On rest days, the full sequence doubles as a deliberate recovery ritual. In the evening, rolling pairs beautifully with winding down — many people do it on the living-room floor and follow it with a few gentle stretches.
Two or three sessions a week is a sensible rhythm for most people; daily gentle rolling is fine if you enjoy it. Keep the roller visible — leaning in a corner of the living room, not buried in a closet — because visible equipment gets used. Consistency at moderate pressure beats occasional punishing sessions by a wide margin.
Step 7: Know the Mistakes and the Stop Signs
The common errors are worth naming because they account for nearly all bad foam-rolling experiences. Rolling too fast turns massage into scrubbing and accomplishes little — slow down until it feels almost lazy. Pressing too hard causes bruising and guarding; if you cannot breathe normally, reduce pressure. Parking on one painful spot for minutes at a time irritates rather than releases — cap tender-spot pauses at about thirty seconds. Rolling joints, bones, or the lower back directly is off-limits. And rolling through sharp or radiating pain is never the answer.
Stop and seek professional advice if rolling consistently makes an area feel worse, if you have swelling or suspect an actual injury, or if pain is sharp rather than dull and massage-like. A physical therapist can tell you whether rolling belongs in your routine and where — and that one conversation is worth more than any amount of guessing.
Final Thoughts
Foam rolling done right is a slow, quiet procedure: a soft-to-medium roller, unhurried passes along each major muscle group, patient breathing on the tender spots, and a firm rule against bones, joints, and the lower back. Run the full-body sequence a couple of times a week — calves, hamstrings, quads, glutes, hips, upper back — and treat it as a standing appointment with your own recovery. It will not perform miracles, but it reliably makes tight muscles feel looser and busy evenings calmer, which is exactly what a wellness routine is for. For anything beyond everyday tightness, put the roller down and put a professional's opinion first.