Leather shoes are one of the few things in a modern wardrobe designed to be maintained rather than replaced. A quality pair, cared for, can look better in its fifth year than a neglected pair looks in its fifth month — leather develops character as it ages, but only if someone keeps it clean, fed, and protected. The full care routine sounds like a craft apprenticeship and is actually a fifteen-minute ritual with four stages: clean, condition, polish, protect. This guide walks through each stage, plus the small daily habits, rain-and-salt first aid, and storage practices that quietly determine whether shoes last two years or ten.
Assemble a Basic Shoe-Care Kit
Everything you need fits in a shoebox and costs less than a single pair of decent shoes:
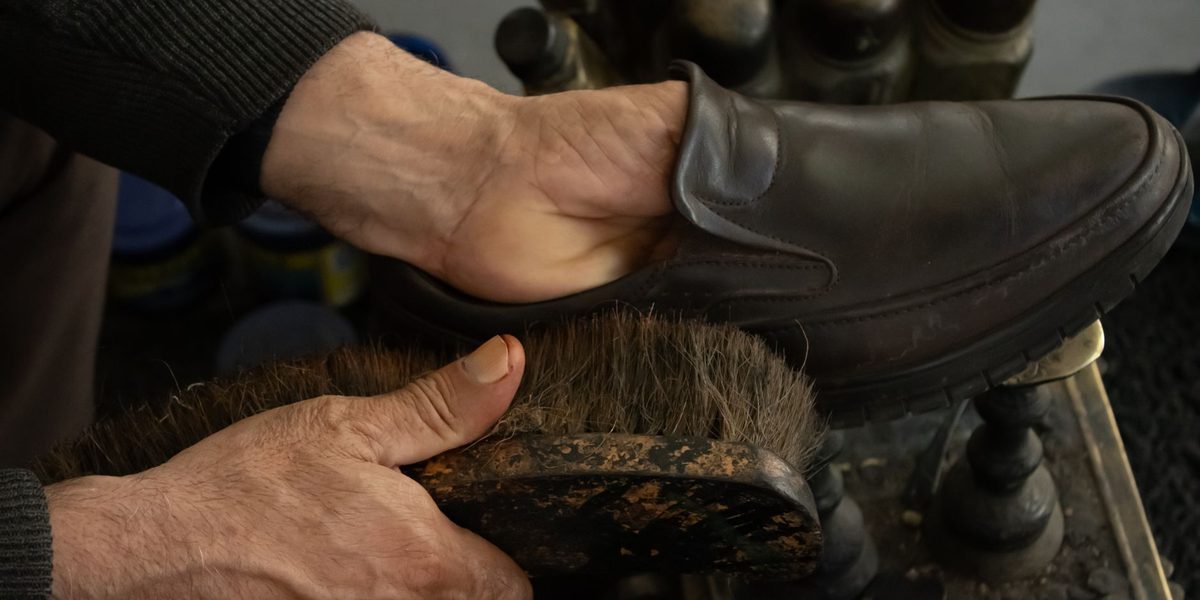
- A horsehair brush — the workhorse, used for both cleaning off dirt and buffing up shine. Two is better: one for cleaning, one for buffing, and ideally separate brushes for dark and light polish.
- Cream polish in a shade matching each pair (or neutral, which works on everything). Cream nourishes and colors the leather.
- Wax polish for the harder, glossier finishing shine and a layer of water resistance.
- Leather conditioner — the moisturizer that keeps leather from drying and cracking.
- Soft cotton cloths — old t-shirts are perfect — plus a small water dish for the final gloss.
- Cedar shoe trees, the unglamorous item that does more for longevity than any polish.
One caution before any product touches your shoes: these techniques are for smooth finished leather. Suede and nubuck are different materials with different care — no cream, no wax — and patent leather needs only a wipe. When in doubt, test any product on an inconspicuous spot like the inner heel.
Stage 1: Clean First, Always
Polishing over dirt grinds grit into the finish, so every session starts with cleaning. Remove the laces — this also lets you treat the tongue and gives tired laces a wash or replacement — and insert shoe trees so the leather holds its shape while you work. Brush the entire shoe briskly with the horsehair brush, paying attention to the welt, the seam where upper meets sole, where dust collects in a gray line.
For grime the brush cannot lift, wipe the shoe with a slightly damp cloth and let it air-dry for a few minutes. Stubborn buildup or old layers of wax respond to a dedicated leather cleaner or saddle soap used sparingly and wiped away thoroughly. The goal is a clean, dry, matte surface — a blank canvas.
Stage 2: Condition the Leather
Leather is skin, and like skin it dries out, stiffens, and eventually cracks without moisture. Conditioning is the step casual shiners skip and the step that most extends a shoe's life. Apply a small amount of leather conditioner to a cloth and massage it over the entire upper in circular motions, including the tongue and around the seams. The leather will absorb it and often darken slightly for a while — that is normal.
Let the conditioner sink in for ten or fifteen minutes, then wipe off any excess. How often depends on wear and climate: shoes worn weekly in a dry climate might want conditioning every month or two, while occasionally worn pairs need it only a few times a year. The leather tells you — when it looks dull and feels dry or papery rather than supple, it is thirsty.
Stage 3: Polish for Color and Shine
Cream polish comes first. With a cloth or applicator brush, work a thin layer of matching cream over the whole upper in small circles, using a modest amount — thin coats absorb and buff properly, thick coats smear and cake. Let it dry for five to ten minutes, then buff vigorously with the horsehair brush using fast, light strokes. The friction warms the polish and raises a soft, healthy glow while the pigment refreshes the color and disguises scuffs.
For a dressier finish, follow with wax polish on top: a thin layer over the shoe, a few minutes to haze over, and another energetic brushing. Wax adds gloss and a sacrificial protective layer that takes the scuffs so the leather does not. If you want the parade-ground mirror finish on the toes, that is the classic spit shine: add a drop of water to the toe cap, and with a cotton cloth wrapped tight around two fingers, work tiny amounts of wax in small circles, layer after patient layer, until the surface turns glassy. It is optional, meditative, and strictly for the stiff toe and heel areas — waxing flex points that heavily causes the finish to crack.
Stage 4: Protect Against Water and Winter
Prevention is cheaper than repair. A quality leather protector spray or a regular wax layer sheds light rain effectively; apply protector after a full care session and renew it periodically, especially heading into wet seasons. When shoes do get soaked, the emergency protocol matters more than any product: stuff them with paper or insert shoe trees, and let them dry slowly at room temperature — never on a radiator, heater vent, or in direct sun, which cooks leather stiff and cracks it. Expect a full day or two for a thorough soaking to dry out.
Winter road salt is leather's worst enemy, leaving chalky white tide lines that etch into the finish if ignored. Remove salt promptly: wipe with a cloth dampened in a mix of water with a splash of white vinegar, then with plain water, dry slowly, and condition afterward, since both salt and vinegar dry the leather. In slushy climates it is worth doing this after every salty outing — it takes two minutes and saves the shoes.
Daily Habits and Proper Storage
The routine above happens every few weeks; longevity is mostly decided by what happens daily. Use a shoe horn — crushing the heel counter with your foot breaks the shoe's structure permanently. Rotate pairs rather than wearing the same shoes every day, because leather absorbs moisture from wear and needs a day to release it; a two- or three-pair rotation multiplies each pair's lifespan disproportionately. Slide in cedar shoe trees when you take shoes off: they pull out moisture, prevent the sole from curling, and smooth the creases across the vamp while the leather is still warm and pliable.
Store shoes out of direct sunlight in a ventilated spot, not sealed in plastic, which traps humidity and invites mildew. For long-term storage, clean and condition first, insert trees, and use cloth shoe bags. If a pair comes out of summer storage looking dull, a single condition-and-polish session brings it back — leather forgives neglect far more readily than it forgives heat and soaking. Finally, watch the heels and soles: replacing a worn heel tip or having a cobbler resole a good pair costs a fraction of new shoes and is exactly the kind of renewal that quality footwear is built to accept.
Final Thoughts
Leather shoe care is a rhythm, not a chore: brush and shoe-horn daily, rotate pairs, and every few weeks run the fifteen-minute cycle — clean, condition, cream, wax, buff — with prompt first aid whenever rain or salt strikes. The reward compounds. Shoes that would have been landfill in eighteen months instead grow handsomer with age, mold to your feet, and cost you less per year every year you own them. Few habits return so much polish for so little effort — in every sense.