Few sounds sink the stomach like the flap and rumble of a flat tire. Yet the repair that follows is genuinely within reach of almost every driver. Changing a tire is a mechanical recipe with no improvisation required: secure the car, loosen, lift, swap, lower, tighten. The whole job takes fifteen to thirty minutes once you have done it a single time. Reading through the process now — before you ever need it — is the difference between a confident roadside stop and an anxious wait for help that may be hours away.
Pull Over Like Your Safety Depends on It
The most dangerous part of changing a tire is not the jack or the lug wrench; it is the traffic passing a few feet away. The moment you feel the telltale wobble or hear the flapping, slow down gradually, put on your hazard lights, and start scanning for a safe place to stop. You can drive a short distance on a flat at low speed — a ruined tire is a fair trade for your safety.
Look for a spot that is flat, straight, and as far from live traffic as possible: a parking lot, a wide shoulder, a quiet side street. Avoid curves, hills, bridges, and narrow shoulders where approaching drivers cannot see you in time. Once stopped, set the parking brake firmly, turn the wheels away from traffic, and keep your hazards on. If you carry reflective triangles or flares, place them well behind the car. If you cannot find a safe location, staying in the car with your seatbelt on and calling for roadside assistance is the smarter choice — no schedule is worth working with your back to fast traffic.
Gather the Tools Hiding in Your Car
Nearly every car ships with the essentials tucked under the trunk floor or cargo mat. Before you begin, lay out everything you will need:
- Spare tire — usually beneath the trunk floor, sometimes slung under the rear of the vehicle.
- Scissor jack — the small folding jack rated for your car's weight.
- Lug wrench — the L-shaped or cross-shaped bar that fits your wheel's nuts.
- Wheel wedges or chocks — or improvise with rocks or bricks placed against the tires on the opposite end of the car.
- Owner's manual — it marks the exact jacking points for your model, which matters more than people think.
- Gloves and a flashlight — worth adding to the trunk kit today if they are not already there.
Check your spare's pressure a couple of times a year during routine errands. A spare that has quietly gone flat over the years is the most common and most preventable failure in this entire process.
Loosen the Lug Nuts Before You Lift
Here is the step that trips up first-timers: the lug nuts must be broken loose while the tire is still on the ground. Once the car is in the air, the wheel spins freely and you cannot get leverage. Remove the hubcap or wheel cover if there is one, fit the wrench squarely onto each nut, and turn counterclockwise. Factory-tightened nuts can take real force — use your body weight, and if a nut refuses to budge, position the wrench arm horizontally and press down steadily with your foot.
Loosen each nut about a half turn only. Do not remove any of them yet. The goal is simply to break the initial resistance so that the rest of the job can happen with the car safely lifted.
Jack the Car Up at the Right Spot
Your car has reinforced jacking points along the pinch weld behind the front wheels and ahead of the rear wheels; the manual shows their exact locations, and many cars mark them with small notches or arrows. Placing the jack anywhere else risks crumpling the underbody or, far worse, having the car slip off the jack. Set the jack on firm, level ground — never soft dirt or gravel that can shift under load.
Crank the jack slowly until the flat tire floats about two to three inches off the ground. You need clearance for the fully inflated spare, which is taller than the flat. Two rules while the car is lifted: never place any part of your body beneath the vehicle, and stop immediately if the car begins to lean or the jack tilts, lowering and repositioning before you continue.
Swap the Flat for the Spare
With the car raised, the exchange itself is quick:
- Fully remove the loosened lug nuts and place them somewhere secure, like the upturned hubcap or your pocket.
- Grip the flat tire at three and nine o'clock and pull it straight toward you off the studs. Set it flat on the ground so it cannot roll.
- Lift the spare, line up its holes with the wheel studs, and push it on until it seats against the hub.
- Thread each lug nut on by hand, tapered side facing the wheel, and snug them lightly with the wrench.
Tighten in a star or crisscross pattern — opposite nuts in sequence rather than around the circle. This seats the wheel evenly against the hub and prevents the wobble that comes from one side clamping down before the other. At this stage, snug is enough; final tightening happens on the ground.
Lower, Torque, and Stow
Crank the jack down slowly until the spare carries the car's full weight, then remove the jack. Now give every lug nut its final tightening, again in the star pattern, pulling as firmly as you can with the wrench. Wheel nuts loosened by under-tightening are a genuine road hazard, so do not be gentle. If you own a torque wrench, tightening to the specification in your manual at home afterward is the gold standard.
Load the flat tire, jack, and wrench back into the trunk, collect your warning triangles, and take a breath. Before pulling away, check the spare's pressure at the first opportunity — a service station air pump will do — because even a healthy-looking spare is often below its required pressure, which for compact spares is typically much higher than a normal tire's.
Respect the Limits of a Spare Tire
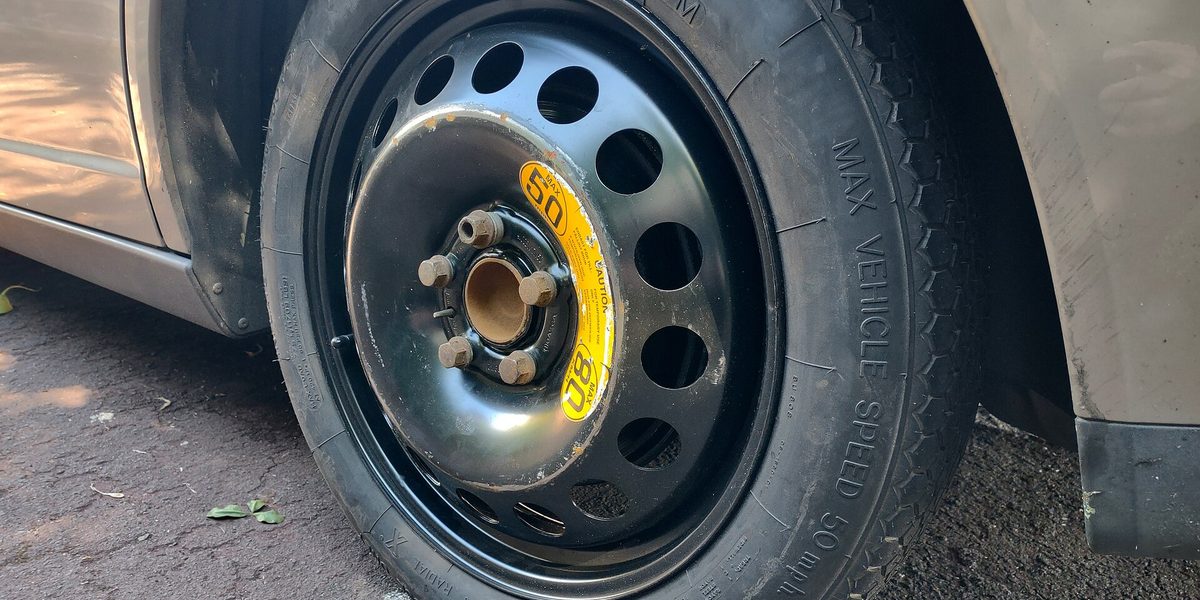
A compact temporary spare — the narrow "donut" — is a get-you-home device, not a replacement tire. It is generally limited to modest speeds and short distances, and it changes how the car brakes and corners, so drive gently and leave extra following room. Head directly to a tire shop to have the flat repaired or replaced. Many punctures in the tread can be repaired properly and inexpensively; damage to the sidewall usually cannot. If your car has a full-size spare, you have more flexibility, but the repaired or new tire should still go back on promptly so you are never driving without a backup.
Note that many newer cars ship with no spare at all, carrying instead a sealant-and-inflator kit or run-flat tires. Check your trunk today rather than at the roadside; if you find a kit, read its instructions once now, since sealant works only for small tread punctures and cannot help with sidewall damage or a shredded tire. Whichever system your car uses, the point is the same: know what you have and how it works before the day you need it.
Final Thoughts
Changing a flat comes down to a sequence you can rehearse in your head at a red light: safe spot, hazards on, brake set, wheels chocked, nuts loosened, car jacked at the marked point, wheel swapped, nuts tightened in a star, car lowered, final torque. Spend ten minutes this week finding your car's jack, spare, and jacking points while the sun is out and nothing is wrong. That small rehearsal is what turns a roadside emergency into a routine stop.