Some people hand over gifts that look like they came from a boutique — taut paper, knife-edge folds, a ribbon that sits just so. Others hand over something that looks like it lost a fight with a tape dispenser. The difference is not artistic talent; it is a handful of measuring and folding techniques that anyone can learn in one sitting. This guide covers the full process of wrapping a boxed gift neatly, from choosing paper that cooperates to cutting the right amount, folding crisp corners, finishing with ribbon, and handling the awkward shapes that defeat most wrappers.
Set Up a Proper Wrapping Station
Neat wrapping starts before the paper touches the box. Clear a hard, flat surface larger than the paper you plan to cut — a table or clean floor works, a bed does not, because soft surfaces make it impossible to pull paper tight or crease it sharply. Gather everything within arm's reach: paper, sharp scissors, tape, ribbon, and scissors you reserve for ribbon if you have them, since cutting paper dulls blades.
Paper choice matters more than people expect. Thicker paper folds into crisp lines and forgives handling; very thin bargain paper tears at corners and shows every flaw. A subtle grid printed on the reverse side is a genuine advantage for cutting straight lines. If your gift is in an odd or flimsy container, put it in a box first — wrapping a box is a solved problem, while wrapping a stuffed animal directly is not.
Measure and Cut the Right Amount of Paper
Almost every wrapping frustration traces back to too much or too little paper. Too little leaves gaps; too much creates bulky, lumpy folds. Use this quick sizing method:
- Roll the box one full rotation along the paper and add a couple of finger-widths of overlap. That is your paper length in one direction.
- For the other direction, the paper should extend past each open end of the box by a little more than half the box's height — enough to cover the end when folded, no more.
- Cut in one long, confident motion, or glide the scissors along the paper's grain. Short, choppy snips create a ragged edge that shows in the final seam.
If you are unsure, err very slightly generous on the ends and trim after a test fold. With a gridded reverse side, follow a printed line; without one, mark the cut line lightly by creasing the paper where you intend to cut.
Wrap the Body With a Tight Seam
Place the box upside down in the center of the paper, so the seam and folds land on the bottom of the finished gift. Bring one long edge of the paper up over the box and tape it directly to the cardboard — this anchors everything and stops the paper shifting while you work. Then fold a narrow hem along the raw edge of the opposite side before bringing it over. That folded hem is the single trick that most elevates a wrapping job: it hides the cut edge and creates a clean, straight line for the visible seam.
Pull the hemmed edge over snugly so the paper is taut around the box, and tape along the seam. Tightness is everything here. Loose paper shifts, bags, and wrinkles; taut paper looks smooth and professional. If your tape allows, use small pieces placed under the hem for an invisible finish, but neatly placed visible tape on a straight seam still looks perfectly tidy.
Fold Crisp Corners on the Ends
The ends are where neat wrapping is won or lost. Work one end at a time, with the box's open end facing you.
- Push the top flap of paper down flat against the end of the box, letting the sides form two angled wings.
- Crease each wing sharply against the box edges, then fold both wings inward against the end so they form clean diagonal lines.
- The remaining bottom flap will be a rough triangle or rectangle. Fold its raw edge under to make a hem, then bring it up over the folded wings.
- Crease every fold firmly with your thumbnail or the back of a fingernail, then tape the final flap in place.
Sharp creases are what create that boutique look — soft, rounded folds read as sloppy even when the geometry is right. Repeat on the other end, and take a second to make both ends match; symmetry is half of neatness.
Add Ribbon and a Bow
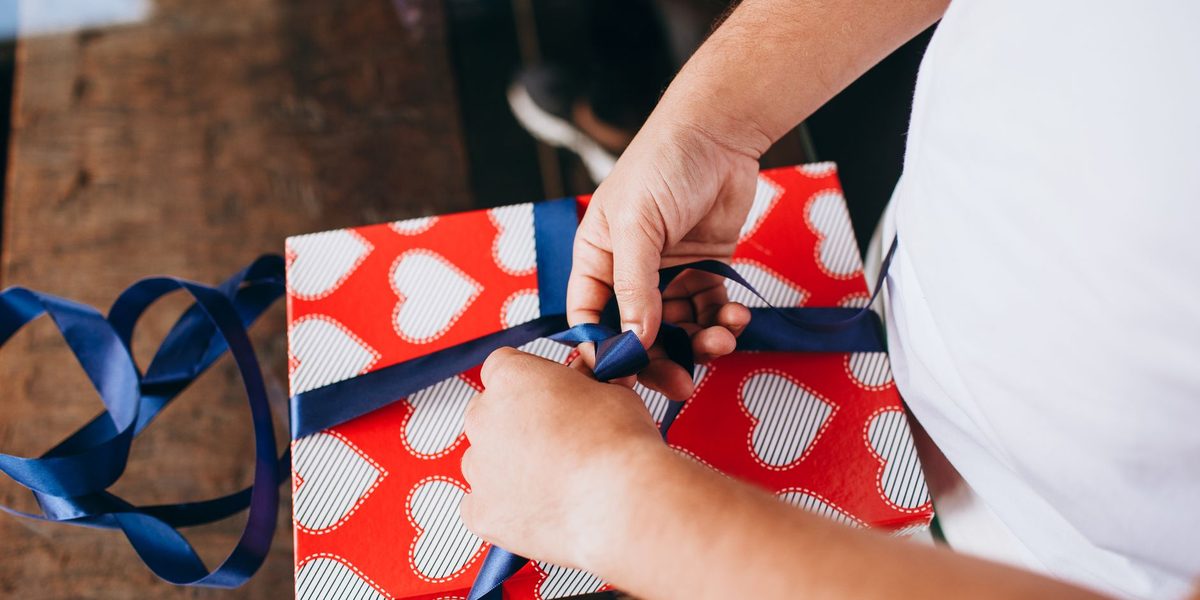
Ribbon hides small imperfections and signals effort, and the classic cross pattern is simple. Cut a length of ribbon roughly enough to wrap around the box lengthwise plus widthwise, with extra for the bow. Wrap it around the box the long way, cross the two ends underneath at the center of the base, rotate each end ninety degrees, and bring them back up around the box's width so they meet on top where the lengthwise ribbon crosses. Tie a firm knot at that intersection, then tie a simple bow just as you would tie shoelaces, shaping the loops with your fingers.
Trim the ribbon tails on the diagonal, or fold each tail flat and cut a notch into the end for a classic swallowtail. If bows defeat you, a pre-made stick-on bow placed over a neatly crossed ribbon still looks intentional. Curling ribbon can be curled by holding it taut against an open scissor blade and pulling — carefully, and always away from yourself.
Handling Odd Shapes, Tubes, and Giant Gifts
Not everything is a tidy rectangle. Cylinders — candles, bottles in tubes, rolled posters — can be wrapped like a piece of hard candy: roll the paper around the tube, then gather the excess at each end and tie it off with ribbon. Alternatively, pleat the ends by folding small overlapping triangles toward the center for a more tailored finish.
Genuinely irregular items — plush toys, kitchen gadgets, sports equipment — go in a box or a gift bag with tissue paper, and no one will think less of the presentation. For enormous gifts, consider a fabric ribbon and bow directly on the item, or wrap a small box containing a note that reveals where the real gift is hiding. Fighting to stretch paper around a bicycle rarely ends in neatness.
Gift bags deserve one technique of their own: tissue paper. Lay two or three sheets in a stack, pinch the center, lift so the corners fall downward, and place the gathered point into the bag with the corners fanning out of the top. Two or three of these puffs fill the opening, conceal the gift, and take about thirty seconds — the fastest respectable presentation there is.
Small Details That Make a Big Difference
- Wrap on the paper's reverse side markings, using the grid for every cut and fold line.
- Face seams and folds downward so the top and sides of the gift are seamless.
- Match the paper's pattern direction so stripes and motifs run the same way on every face.
- Use double-sided or hidden tape for special gifts, and matching-color tape otherwise.
- Add a small tag tied into the ribbon knot rather than taped askew on the paper.
- Store leftover paper rolled, not folded, so next time you start with smooth stock.
Final Thoughts
Neat gift wrapping comes down to a firm surface, the right amount of paper, a hemmed seam, taut tension, and sharply creased corners. None of those steps requires artistry — only a few minutes of unhurried attention. Practice on one box and the technique locks in for life, and every gift you hand over afterward will carry that quiet, satisfying signal that someone cared enough to do it properly.